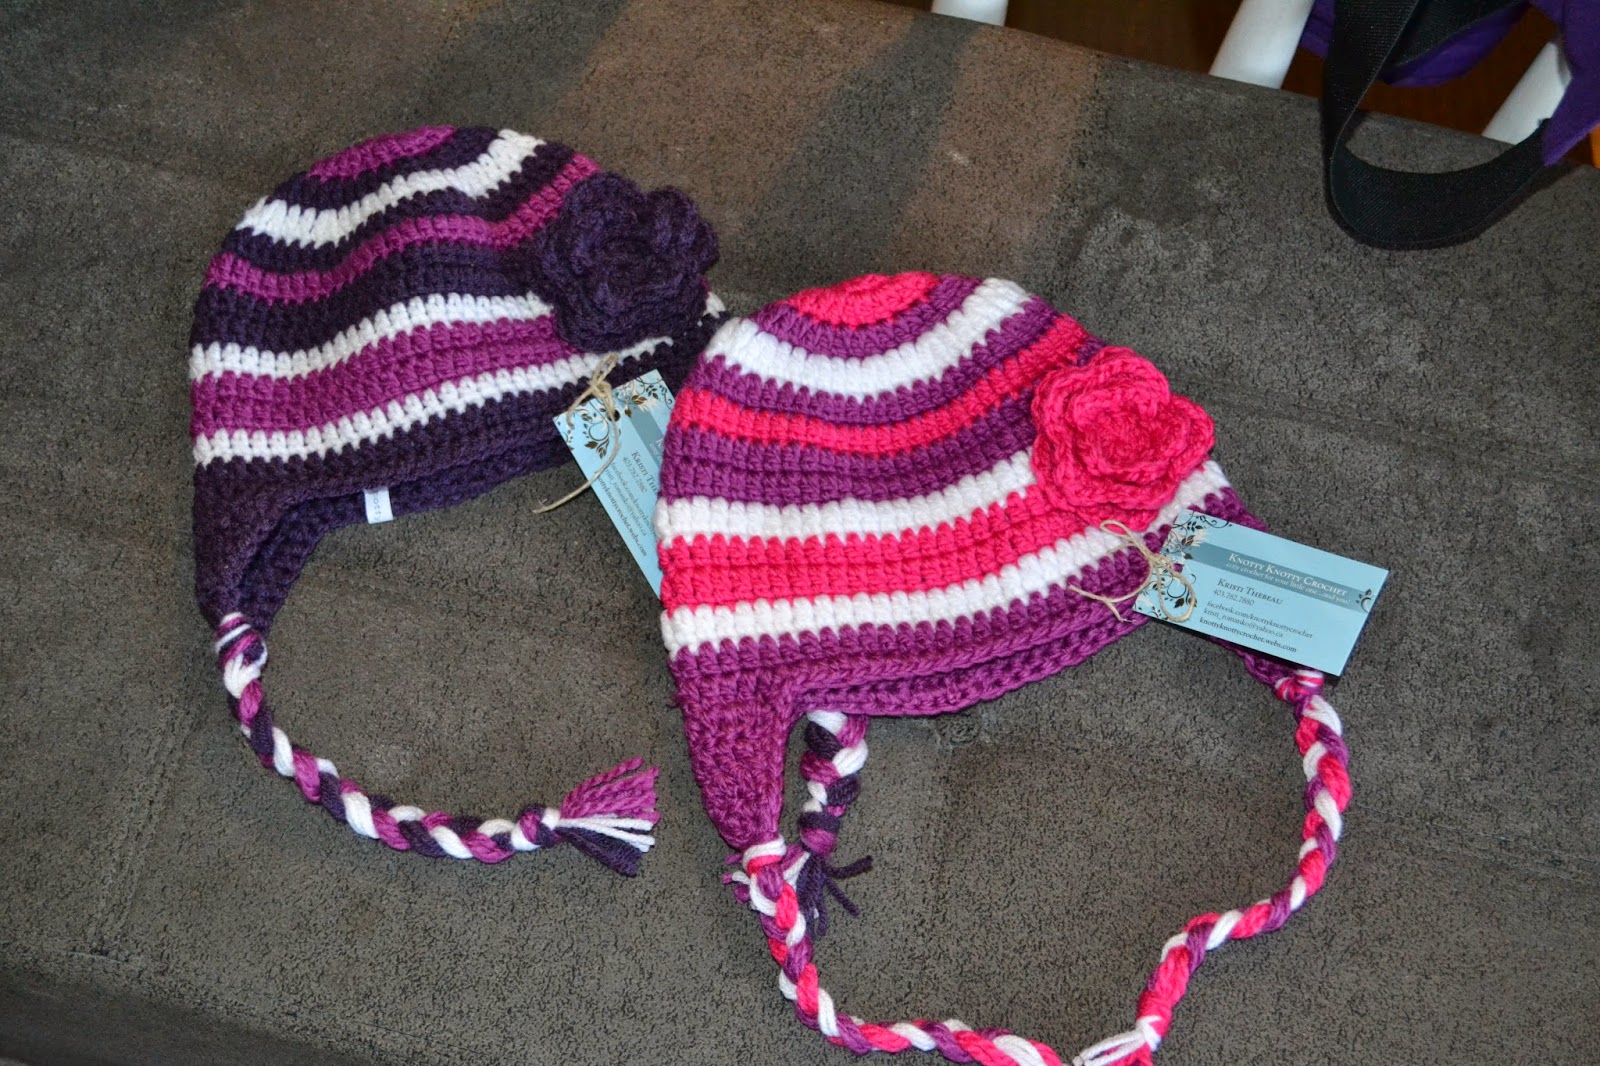
This is my new favourite hat to do because it is super simple, yet looks great. You can use as many or few colors as you like, and each hat will be unique and different with the SAME PATTERN! Gotta love that.
I have been having a little pouting fit lately because the bulky yarn I used to use from Bernat was discontinued and replaced with a new 'super' bulky yarn. sheesh. Didn't they consider that I had already spent a LOT of time figuring out exactly how many stitches, rows, etc went into making each size of hat perfectly....they probably didn't. And so, my pattern that I love is no longer useful with the yarn I liked because it is no longer available. But the colors I love are, just in this new bulkier yarn. So I took the time to play with hook size, stitches, counting measuring and I FINALLY figured out a way that I can make my hats. They are a bit thicker, and warmer which is fantastic considering the average tempurature here in northern Canada has been around the -30 C mark (that would be around -22 F for my friends south of the border).
So here is my pattern:
Materials
super bulky yarn size 6 in three colors (I used Bernat Softee Chunky in Grape, Dark Mauve and White)
K hook (6.5mm)
Darning needle for weaving in ends
COLOR A
Begin with magic ring
Round 1: 10 hdc in the magic ring. Pull tail closed and join to first hdc. (10 sts)
Round 2: ch1. 2 hdc in each stitch around. Join to first hdc made. (20 sts)
CHANGE TO COLOR B
Round 3: ch 1. *2 hdc in first st. 1 hdc in next st.** Repeat from * to ** 9 more times. (30 sts.)
CHANGE TO COLOR C
Round 4: Ch 1 *2 hdc in first st. 1 hdc in each of the next 2 sts. ** Repeat from * to ** 9 more times. (40 sts)
CHANGE TO COLOR B
Round 5: Ch1. *2 hdc in first st. 1 hdc in each of the next 3 sts.** Repeat from * to ** 9 more times. (50 sts)
CHANGE TO COLOR A
Round 6: Ch1. hdc in each sts around. (50 sts)
CHANGE TO COLOR B
Rounds 7 & 8: Ch1. hdc in each sts around. (50 sts)
CHANGE TO COLOR C
Round 9: Ch1. hdc in each sts around. (50 sts)
CHANGE TO COLOR A
Rounds 10 & 11: Ch1. hdc in each sts around. (50 sts)
CHANGE TO COLOR C
Round 12: Ch1. hdc in each sts around. (50 sts)
CHANGE TO COLOR B
Round 13: Ch1. hdc in each sts around. (50 sts)
Fasten off yarn using invisible knot.
ADDING EARFLAPS
1) Fold hat flat with the joining seam in the middle of the back. Be sure the front of the hat is facing you. Count in four stitches from each side and place a marker at both spots. count back 10 sts, including the st the marker is in and place another marker at each spot. This is where the earflaps should be. Join yarn (I join the left earflap from the front of the hat and the right one from the back so my flaps both look the same.) ch 2, dc in same st as ch 2. dc over next 9 st. (10 dc, as ch 2 does not count as dc) ch2 turn
2) dc2tog dc till 2 sts remain. dc2tog. ch 2. trun.
3) dc2tog over next 2 sts. dc until 2 sts remain. dc2tog. ch 2. turn.
4) Dc2tog over next 2 sts. dc until 2 sts remain. dc2tog. ch 2. turn.
5) dc2tog over next 2 st. dc. dc2 tog over next 2 st. do not fasten off. turn work so that right side is facing you. sc evenly down side of earflap, sc in each st around. fasten off with invisible knot.
add strands to the bottoms of the earflaps for braiding.
FLOWER
start with a magic ring.
Round 1: 10 hdc in magic ring, join to top of first hdc made. pull tail of yarn tightly to close ring.
Round 2: (ch 3, skip next hdc. sl st into next hdc.) Repeat 4 more times. 5 loops made.
Round 3: working into each loop made by the ch 3: (sc, hdc, dc, hdc, sc) 5 petals made. after completing the last sc, sl st into the back of first petal made where the ch attaches to the original circle made in round 1.
Round 4: Ch 4. sl st to the back between petals 1 & 2. Repeat always connecting to the back behind each petal. 5 new loops made.
Round 5: working into each loop made by the ch 4: (sc, hdc, 2 dc, hdc, sc) 5 petals made. Sl st behind petal and fasten off leaving a long tail for sewing on flower.
You can continue making a third round by making another row of loops (increasing by one more ch) and then another row of petals (increasing by one more dc).
There it is. Try experimenting with different colors and patterns. I would love to see what you come up with. Feel free to post your projects on the knotty knotty crochet group on facebook! If you are having trouble getting the size that you need refer to the hat size chart.

 |
| I made this little hat for my daughter's doll so that they could match! |
For a list of crochet stitches and how to make them go here. **You may use this pattern to sell items, but I request that a link or credit be given back to this site** This is a ©2014 Knotty Knotty Crochet pattern, and may not under any circumstances be sold in whole or in part. Duplication is by written permission only.
All photos on this blog are ©Knotty Knotty Crochet and MAY NOT UNDER ANY CIRCUMSTANCES be used to sell your items.
All photos on this blog are ©Knotty Knotty Crochet and MAY NOT UNDER ANY CIRCUMSTANCES be used to sell your items.


