Who loves these little guys as much as I do? Well, if you are blessed enough to have four little ones who
LOVE are obsessed with these movies, then you would know what it is like to hear one liners from Despicable Me all day long!
I never quite realized how funny these movies are until we were on holidays this summer. Usually if the kids are watching a movie I am frantically trying to use up the 90 minutes to finish some housework, blog, or chat with a good friend on the phone. Or just sit and veg without really paying attention to much. After all how many precious, quiet moments does a stay at home mom get during the day? Anyway, being stuck in the vehicle on a several hour drive, we had this movie playing on the laptop and, to my surprise, I was actually listening to it, and enjoying it. I must say it is quite funny.
I can see why my kids have taken such a liking to these little guys, they really are quite endearing!
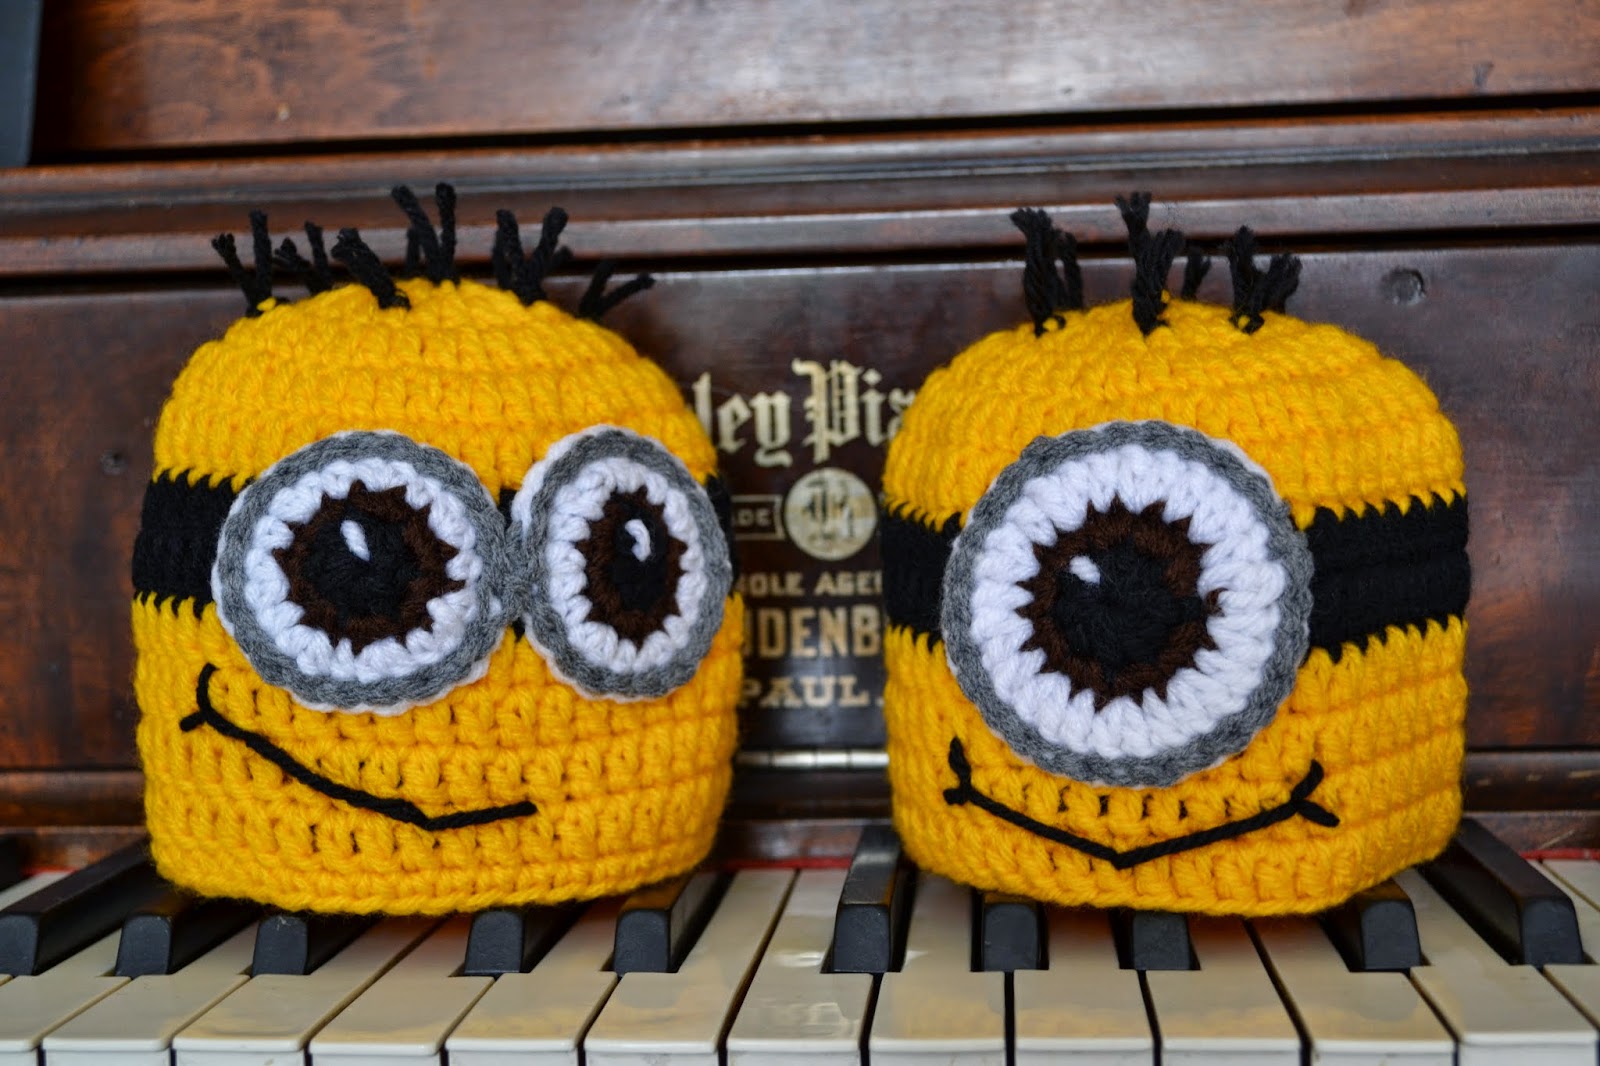
So of course, inspired by my kids, (and a few pins on pinterest) I decided to come up with a hat and pattern for the minion. Without further adieu here it is:
H hook
worsted weight yarn in school bus yellow (I use bernat)
this pattern will fit a newborn baby
1) with yellow start with magic ring
2) ch 2 (counts as dc) in magic ring, 11 more dc in magic ring. join to top of ch 2. (12 stitches. )
3) ch 2. Dc in same st. 2 dc in each st around. Join to top of ch2. (24 stitches)
4)ch2. dc in same st. 1 dc in next st. {2 dc in next st. 1 dc in next st.} repeat all the way around join to top of ch 2. (36 stitches)
5) ch 2. dc in same st. 1 dc in next 2 sts. {2 dc in next st. 1 dc in next st. 1 dc in next st.} Repeat around and join round to top of ch 2. (48 st.)
6) ch 2. dc in same st. dc in each stitch around and join black yarn to top of ch 2.
7)repeat round 6 two times with the black yarn, change color back to yellow.
8) repeat round 6, 4 times with yellow yarn.
9) sc around bottom of hat. Fasten off, or use invisible knot.
For the girly version, I did a row of pink sc around the bottom of the hat. You could also do a row of blue and add earflaps if you wish. Check out the sock monkey pattern on how to do that.
EYE
Make one or two, depending on which minion you would like.
Using black
1) starting with a magic ring ch2. hdc 9 stitches in round and join to top of ch 2. pull magic ring closed.
2) attach brown yarn 2 sc in each st around. join (18 dc)
3) with white {2 hdc in first st, 1 hdc in next st} repeat all the way around, join. (27hdc) Before breaking yarn, sew a little 'gleam' with the white yarn onto the black part of the eye (pupil) It gives the eye so much more life. Just make sure they are both the same if you are doing the two eyed version.
4) attach grey yarn, sl st all the way around the eye to make the 'rim' if the goggles. Fasten off leaving long tail for sewing on eye(s).
Sew eyes onto hat. Make sure to position them straight on the goggle band. I find that pinning them in place helps.
MOUTH
Using black yarn and a needle stitch on the mouth. I found it helpful to actually google some pictures of these guys and see all the expressions they have. Then just copy the one that you want! Try adding a red tongue, or teeth if you want.
HAIR
add strands of hair as desired. I would also suggest google-ing this to give you some ideas on the different hairstyles these guys have.
I found a bow pattern here.
I hope you have fun with this pattern! If you would like to purchase a pre made hat, please visit us on facebook at Knotty Knotty crochet
For a list of crochet stitches and how to make them go here.
**You may use this pattern to sell items, but I request that a link or credit be given back to this site** This is a ©2013 Knotty Knotty Crochet pattern, and may not under any circumstances be sold in whole or in part. Duplication is by written permission only.
All photos on this blog are ©Knotty Knotty Crochet and MAY NOT UNDER ANY CIRCUMSTANCES be used to sell your items.